

How To Change Cabin Air Filter 2014 Ford Fusion
Ford Fusion Motel Air Filter Replacement Guide
How to make clean or modify the A/C system'due south cabin air filter in a 2nd generation 2013 to 2016 Ford Fusion with pictures.
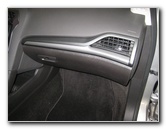
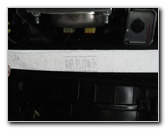
2014 Fusion Glove Box
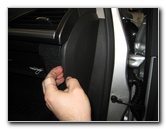
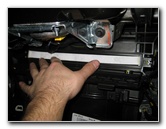
Gently Pry Off Trim Panel
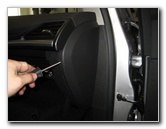
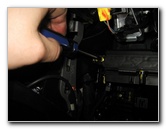
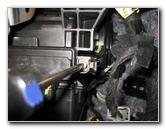
Loosen With Screwdriver
Owners of other Ford or Lincoln vehicles such equally the Focus, Fiesta, C-Max, Mustang, Escape, Transit Connect, Edge, Flex, Explorer, Expedition, Taurus, F-150, EcoSport, MKC, MKZ, MKS, MKX, MKT and the Navigator may also notice these DIY instructions to be helpful.
A few compatible replacement cabin air filters with their part numbers are as follows: Wix WP10084, Ecogard XC10011, TYC 800187P, Motorcraft FP71, Parts Master 94367, Hastings AFC1571, GKI CF1182, Fram CF11775 and OEM # CAF269P.
The tools needed to consummate this procedure include a flathead screwdriver (or a plastic automotive console pry bar), a 7mm socket, an extension bar, a 1/4" bulldoze ratcheting wrench and a Phillips head screwdriver.

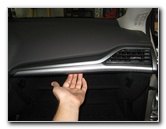
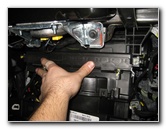
Trim Panel Removed
Pull Off Front Bezel
Plastic Trim Strip Removed
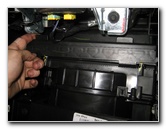
Open the glove box and empty out the contents.
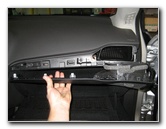
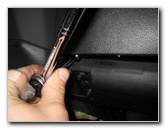
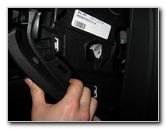
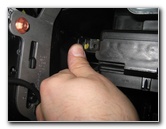
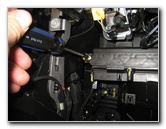
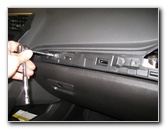
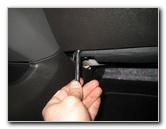
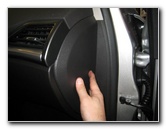
Gently pull off the plastic trim panel on the outside border of the dashboard.
Loosen the panel with your fingers and if necessary, apply a flathead screwdriver or a plastic automotive panel removal tool to pry it off.
Prepare the outer edge trim panel bated in a safe place.
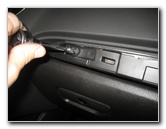
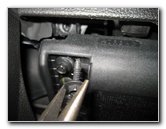
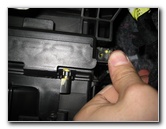
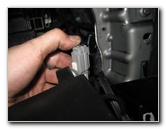
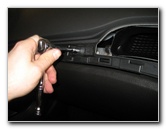
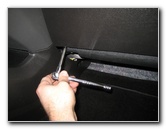
Then gently pull off the plastic trim piece that runs along the dashboard just higher up the glove box and surrounds the air vent.
Try to avoid using excessive strength, the plastic bezel should pop off relatively hands.
Set the trim console aside in a safety place.
Two Pinnacle 7mm Screws

Loosen Counterclockwise
Remove 2nd 7mm Screw
Set the two screws bated in a safe place.
Remove Lower 7mm
2nd Lower 7mm Screw
Pull Out Left Side Spiral
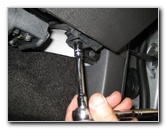
(Brand sure you don't accidentally remove the bolts on the knee air bag unit which is located nether the glove box. The bolts on the airbag are 8mm.)
There is one screw on the right side facing down towards the floor mat.
The spiral on the left side of the glove box is installed at an angle.
You might need a pair of needle olfactory organ pliers to remove the screw on the left side.
Iv 7mm Screws Removed
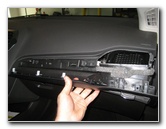
Gently Pull Out Glove Box
Release Friction Fasteners
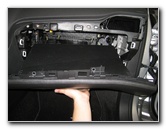
Glove Box Removed

Plastic Clips & Slots

Press In Release Tab
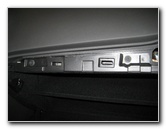
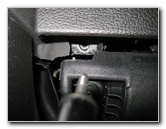
Printing in the release tab on the power plug and slide it directly out of its socket.
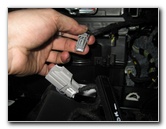
Disconnect Power Plug
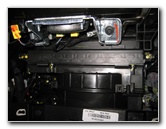
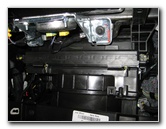
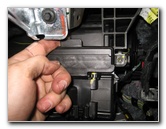
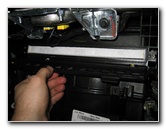
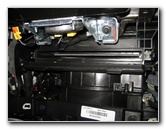
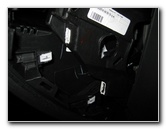
HVAC Blower Motor Housing
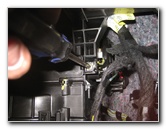
Loosen Counterclockwise
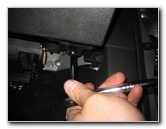
Locate the ii screws that secure the rectangular black plastic filter admission panel to the HVAC blower motor housing.
Remove 2d Phillips Screw
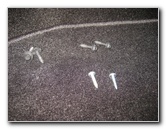
6 Screws Removed
Filter Admission Embrace
In that location is i screw on the left side and another on the far right side.
Set the screws aside with the other fasteners.
Gently Push Out Clip
Release Correct Side Prune
Pull Out Top Plastic Tab
So pull out the ii big blackness plastic tabs on the top edge of the filter cover.
Release 2nd Plastic Tab
Swing Open up Filter Cover

Slide Out Erstwhile Cabin Filter
Slide the former cabin air filter directly out of the slot.
Inspect Both Sides
Clean With Vacuum
Empty Filter Slot
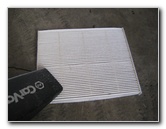
If the old filter is relatively clean, only tap out the large debris and remove any fine grit with a moisture/dry shop vacuum.
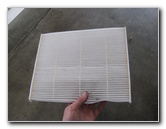
If the old filter is night grey or black and chock-full with dirt, dust, leaves, insects, twigs, pollen and other debris, it should be replaced with a new element.
I'd recommend going with the Ecogard XC10011 cabin air filter since information technology has the best reviews on Amazon.
"Air Flow" Arrow Downwards
Slide In New Filter
Close Hinged Cover
Slide the new filter directly in to the slot.
Swing the filter encompass upwardly and gently snap it back in to place to secure the retaining clips.
Tighten Phillips Caput Screw
Tighten second Screw Clockwise
Glove Box Light Power Plug
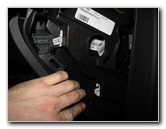
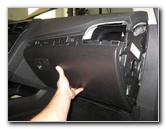
Lift the glove box and concur it about the dashboard.
Slide the electrical connector for the glove box calorie-free back in to its socket.
Line Up Clips & Slots
Push button Glove Box In Place
Tighten 7mm Clockwise
Gently push the glove box back in to place.
Re-insert the two 7mm screws on the upper edge of the glove box and tighten them in the clockwise direction.
Replace 2d Elevation Screw
Lower Right 7mm Screw
Left Side 7mm Spiral
Spin In Clockwise
Tighten With Wrench
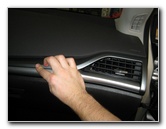
Push On Air Vent Bezel
Line up the plastic trim panel over the A/C vent and gently push information technology back in to identify.
Trim Piece Secured

Line Up Outside Cover
Push Panel In Place
Savor the fresh clean air from your A/C arrangement!
For more, cheque out my other 2013-2016 Ford Fusion DIY Repair & Maintenance Guides.

How To Change Cabin Air Filter 2014 Ford Fusion,
Source: https://www.paulstravelpictures.com/2013-2016-Ford-Fusion-Cabin-Air-Filter-Replacement-Guide/
Posted by: stewartasher1959.blogspot.com
0 Response to "How To Change Cabin Air Filter 2014 Ford Fusion"
Post a Comment